
This article is no longer updated.
Please go to our new Intercom knowledge base to ensure you're seeing the most recent version.
The link above takes you directly to the equivalent article on Intercom.
This script is found at Common Tasks > Billing > Process all unbilled amounts.
See notes at the end of the article about processing a smaller set of unbilled amounts.
Overview
The process to finalise billing records produces an export file on one of a choice of templates, or produces invoices. It also enters a date in the Date Billed field. That has two effects:
- The Status changes automatically from "Uninvoiced" to "Invoiced".
- The record is no longer editable.
If you select to generate invoices in this step, rather than simply export for an accounting system, an invoice number is entered in the Invoice field.
Prior to being finalised, billing records already appear in the Accounts tab of the Student and the Line Items tab of the Debtor, but they have no Date Billed and they are white. Once billed, they are shaded yellow.
Process Unbilled Amounts
This is usually the last stage in your billing process, after you have worked through all the scripts in Common Tasks > Billing to send various types of fees to accounts. See the related articles for the different kinds of fees you may want to send across. Key scripts include:
- Send Tuition Fees to Accounts
- Send Scholarships to Accounts
- Send Ensemble/Class Fees to Accounts
- Send Ensemble/Class Discounts to Accounts
- Send Instrument Hire to Accounts
To process all uninvoiced (or 'unbilled') student accounts line items, go to Common Tasks > Billing > Process All Unbilled Amounts.
The script opens the Student Accounts File with the uninvoiced line items in the found set.
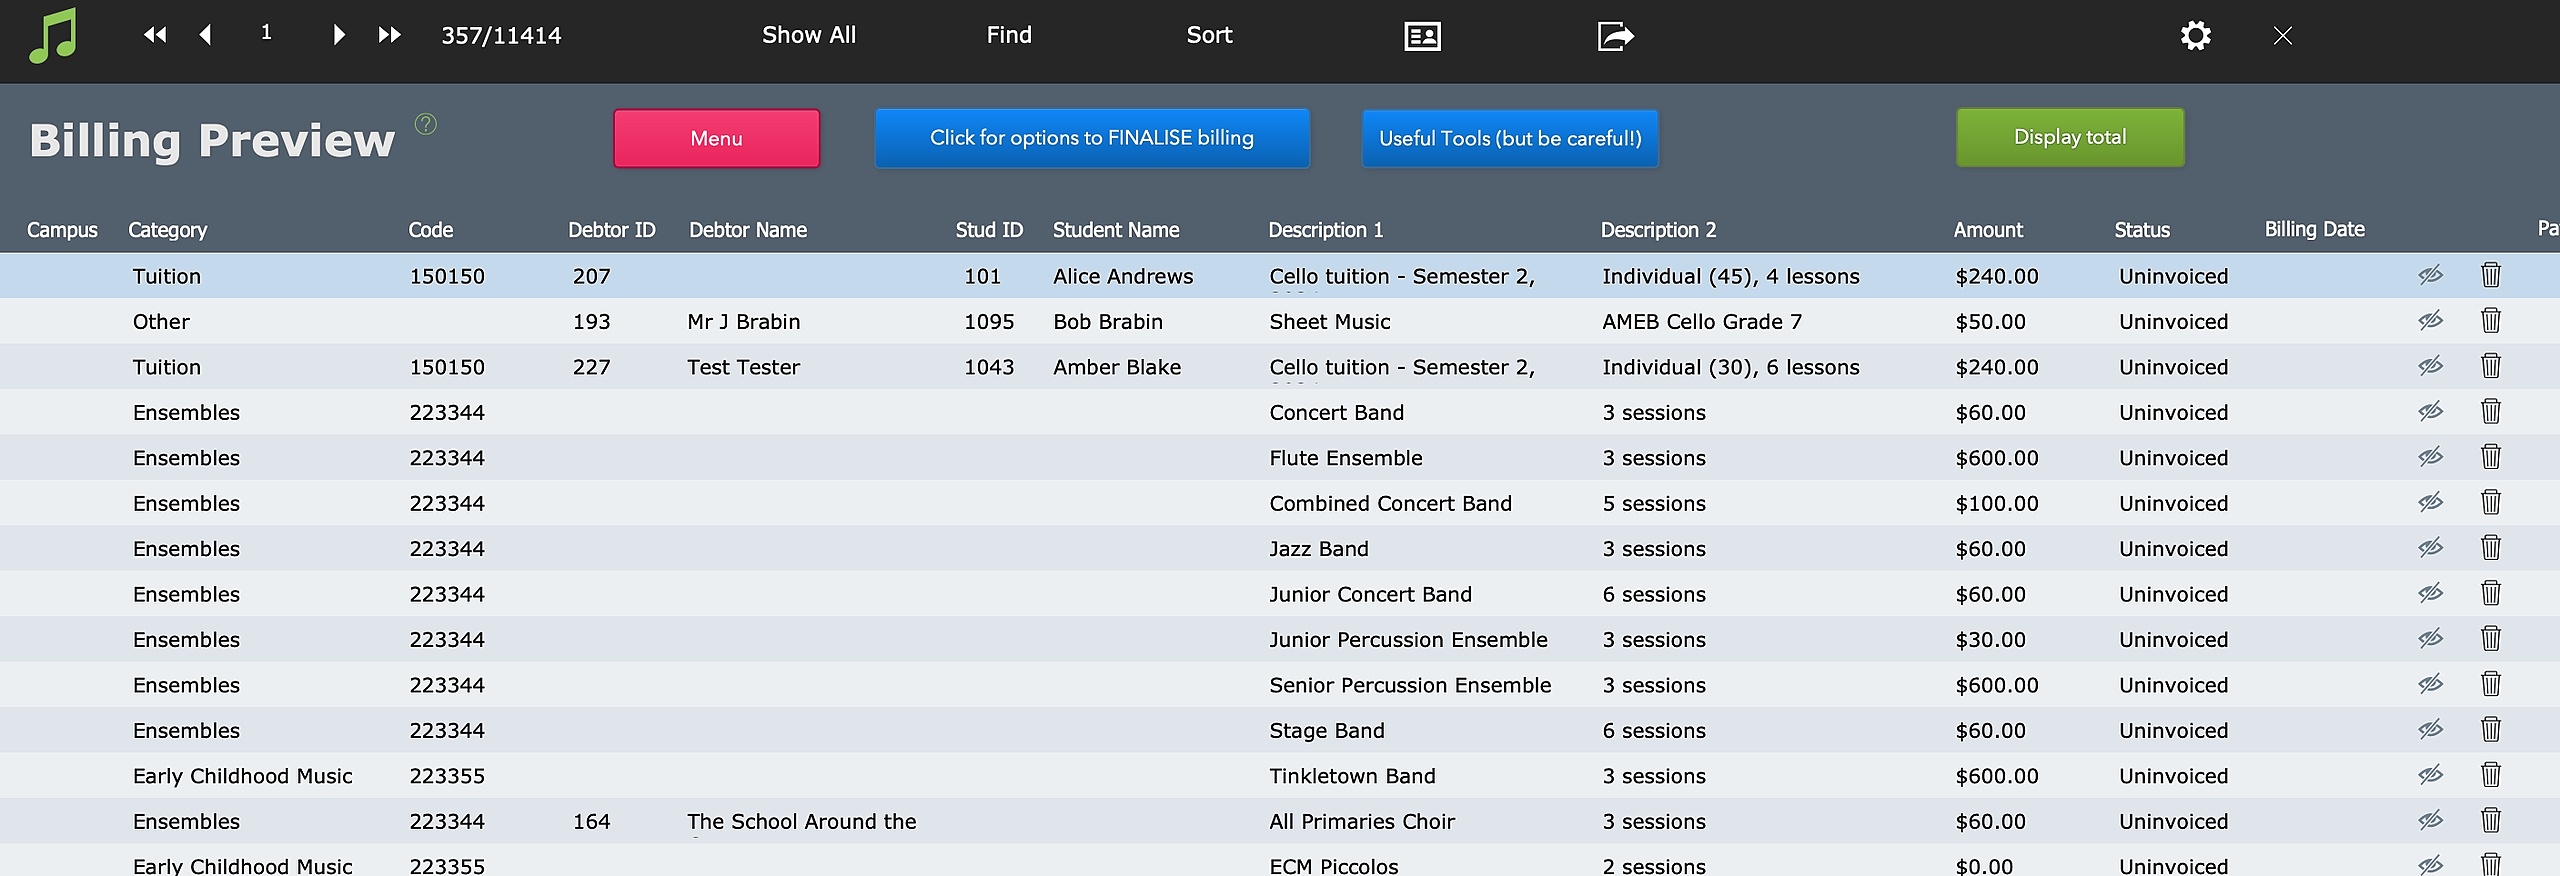
Review the records and use the eye icon to Omit any that you do not wish to include in the billing run.

You can also directly edit the records in this screen, if needed.
Once you have the correct list, select the blue Click for options to FINALISE billing button at the top.
The exact options available vary depending on the settings selections in General Settings.
The main options are to:
- Use one of the ‘Save/Send’ options to produce a spreadsheet for the accounts department.
- Use Produce Invoices option to create invoices to be sent to the debtors.
- Produce Billing Statements.
The menu will pre-select the option you chose last time, which will generally be the correct one for your business process. If you are starting new, please check with our support team to confirm which option you will be using.
See Produce and Send Customer Invoices for an overview of that option.
Process Only A Few Amounts
You can use this same function in Music Monitor to finalise just a few specific billing lines, without processing everything that's currently in your 'billing bucket'.
Find Selected Items
If you start the script as above, you come to the Billing Preview screen. Instead of merely scrolling the list and omitting some items, you have the option here to use the Find button and bring up a much more precisely selected list of items.
Note that when you use the Find function, it searches the whole Student Accounts file, which means the results will not be restricted to those that have not been billed. So, remember to specify an empty Billing Date field, or use a new request to omit those with something entered in the Billing Date, so as to find only those that are not billed.
Once you have brought your list down to just those you wish to include in this run, the finalising step will affect only those in your current found set.
Process Items for One Student
Alternatively, you can opt to finalise billing for an individual student.
Go to the student's record in the Students file, and go to their Accounts tab.

Select the green Process unbilled amounts button.
You will come to the Billing Preview screen again, but with only the unbilled lines for this student showing in your list. You can still omit items as needed, and then finalise the resulting set.