This article is no longer updated.
Please go to our new Intercom knowledge base to ensure you're seeing the most recent version.
The link above takes you directly to the equivalent article on Intercom.
Music Monitor can produce Billing Statements and send them to debtors. These statements are intended as a supplement to a typical school invoice, which offers less detail. Billing Statements should be used in conjunction with sending billing data to an accounts department for processing and invoicing.
Billing Statements should not be modified or deleted unless the Accounts Department make the same changes.
Billing Statements should not be produced until AFTER you have 'Processed all unbilled amounts'.
Settings
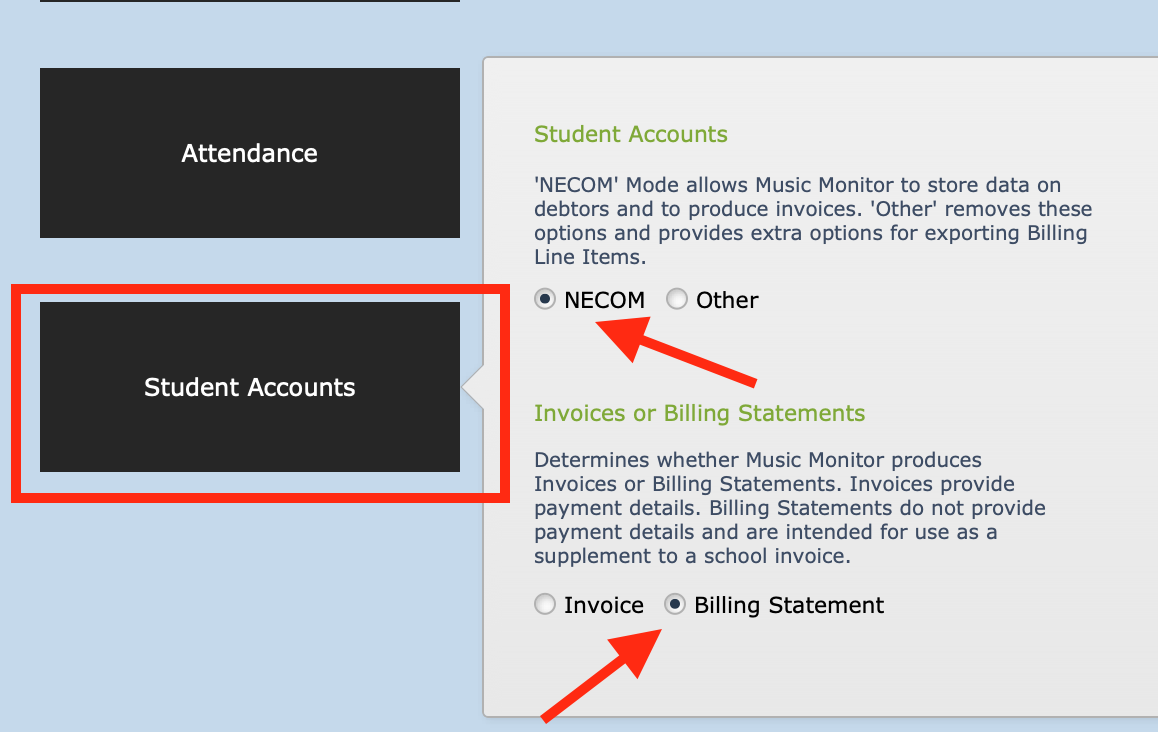
To use Billing Statements, the following settings must be selected:
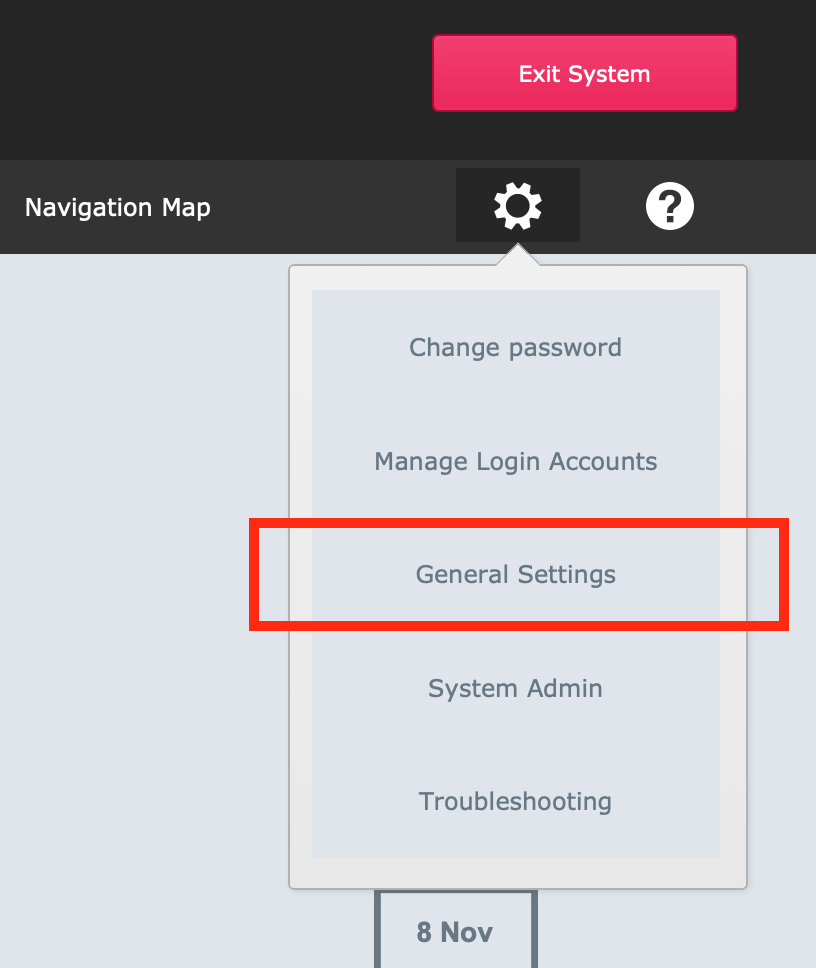
In General Settings
Select Student Accounts and set the options as shown.
Procedure
To make use of Billing Statements, first, follow a standard billing procedure including processing all unbilled amounts by using a ‘Save/Send’ option.
To produce billing statements, go to Common Tasks > Billing > Produce Billing Statements. Billing Statements require debtor details to be imported from the students file, so you will first be asked if you wish to run this process.
The script will then find all line items with the most recent ‘Date Billed’ and display them for review. (You can do another find on this screen if you wish to find records with a different billing date.)
If you are happy with the found set of line items, Click for options to finalise billing (blue button at top of screen), select Produce Billing Statements and then Finalise billing.
You will then be taken to a 'set-up' screen where you can enter a heading (eg. Billing Statement) and notes to appear at the bottom of the documents. Select Continue and the billing statements will be produced (depending on how many line items are in the found set, this could take a couple of minutes).
The script will pause in 'preview' mode and you will be able to scroll through the Billing Statements to check them. If you wish to change anything about the set-up, select Continue at the top right of the screen and another dialog box will appear. You can select Cancel and start over, or OK to finalise the Billing Statements.
When the process is finished, you will see a list of Billing Statements (they are actually called 'Invoices' on this screen, but you can ignore that!)
Select the envelope at the top of the screen and Email or Print Invoices for Found Set to send the statements. (We usually suggest doing a find for a smaller group to test this process first eg. Ref Nos 1...10. There's nothing worse than jamming your computer with a bunch of emails that are not sending properly!)


