This article is no longer updated.
Please go to our new Intercom knowledge base to ensure you're seeing the most recent version.
The link above takes you directly to the equivalent article on Intercom.
Calendar entries can be updated by changing the schedule and selecting More... > Update All Existing Calendar Entries. However, this script deletes and re-creates the entries, so the process will clear any manual edits to the times and days of the lessons. As such it's not an ideal way of updating the room for some schools.
An alternate method provides the ability to update just the room on a set of calendar entries, without changing other details.
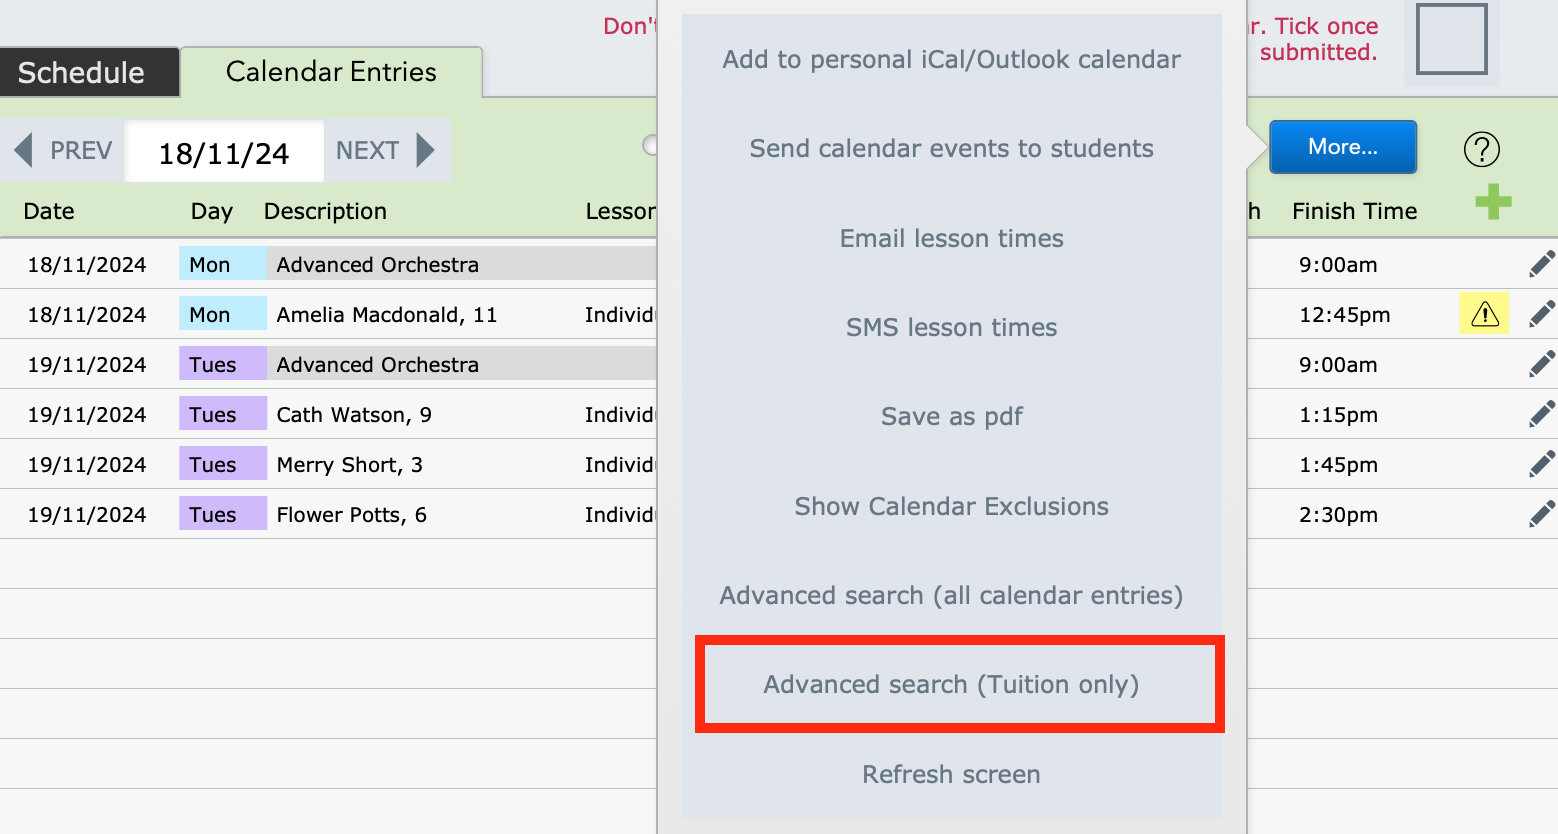
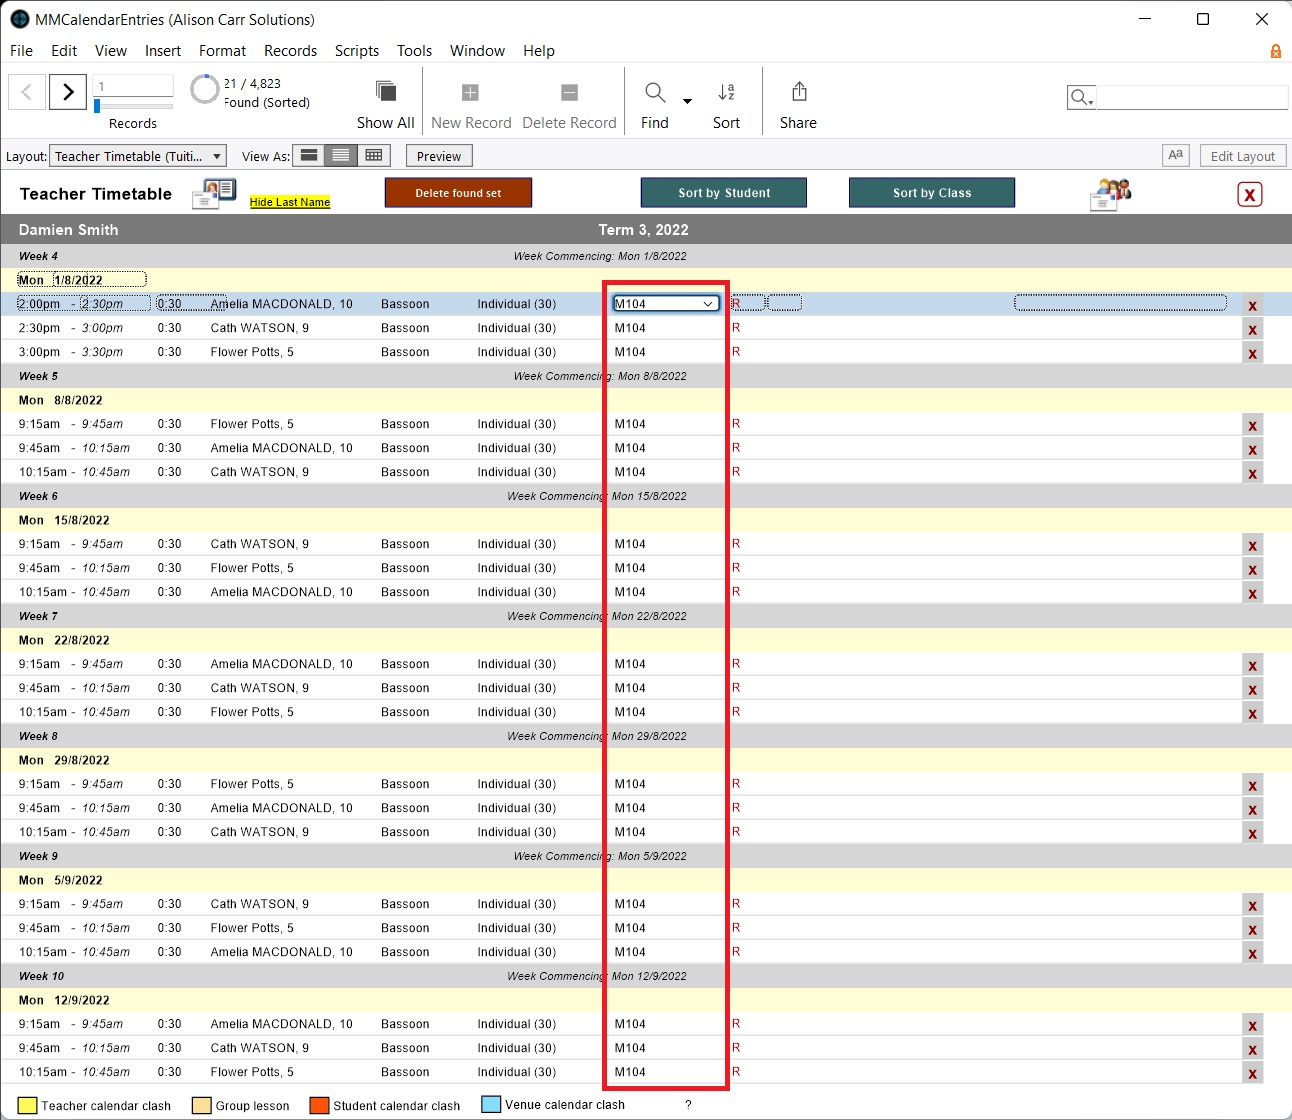
Go to Office Admin > Timetabling > Calendar Entries > More... > Advanced Search (Tuition Only).
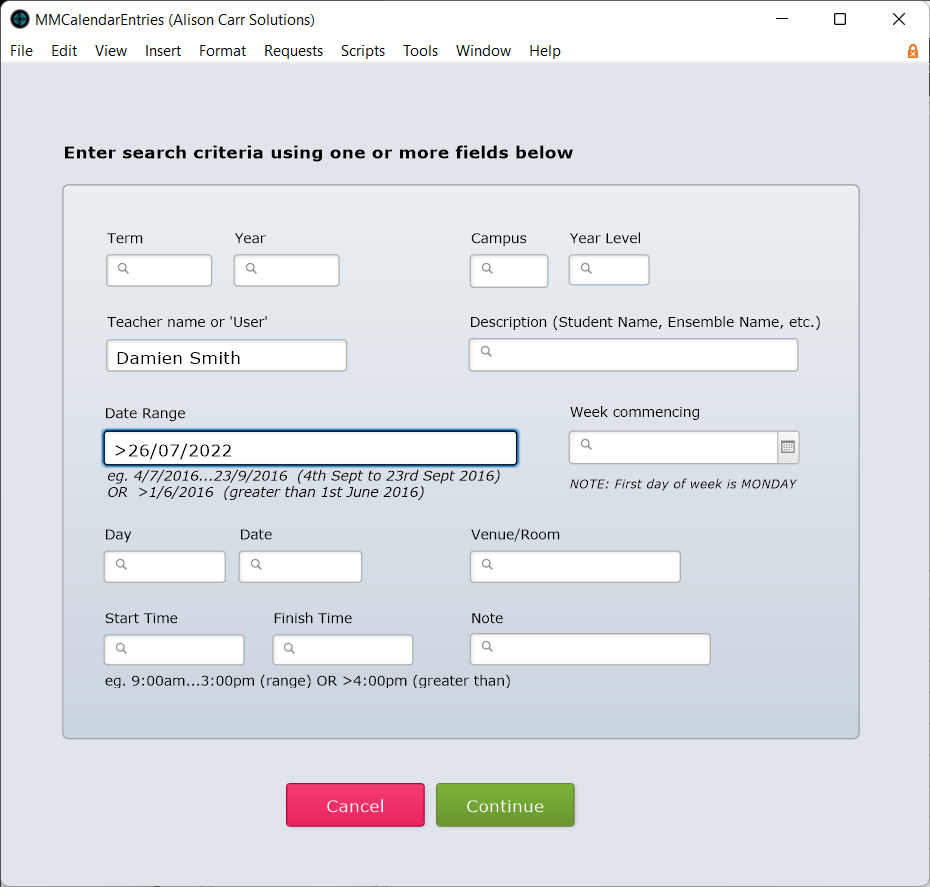
Enter details for the set of calendar entries you would like to update. In this example, the search is for future calendar entries for one specific teacher.
Change the room for one entry, then (while keeping the field selected) go to Records > Replace Field Contents.
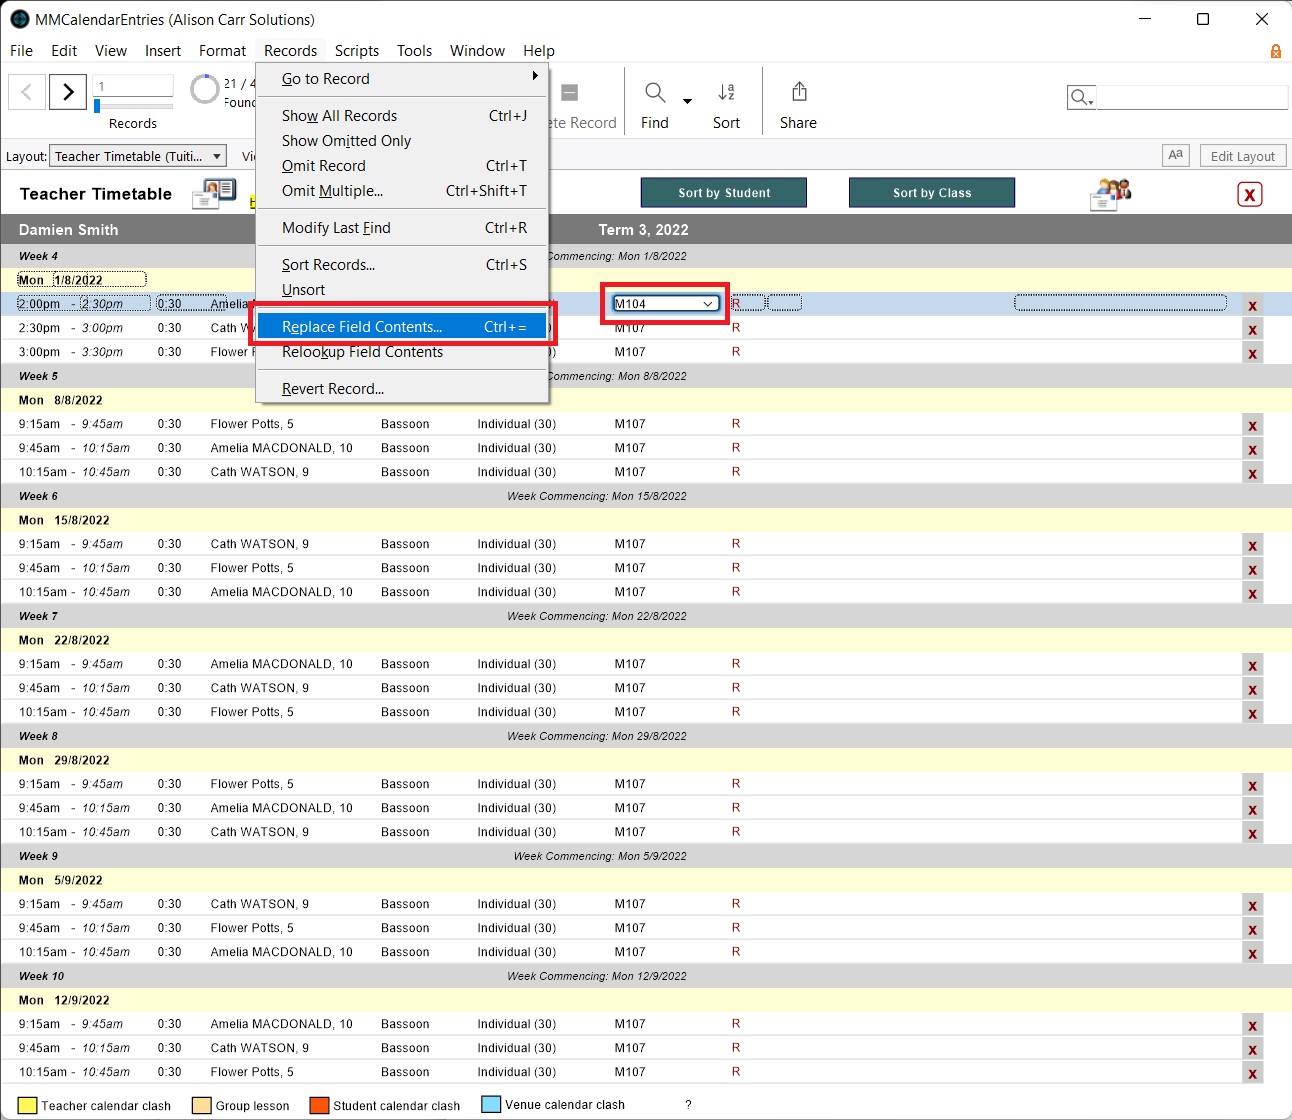
Then, on the dialog box, select Replace. (The 'Replace with' content will be a long string of letters and numbers as in the screenshot below. This is the room's unique ID code.)
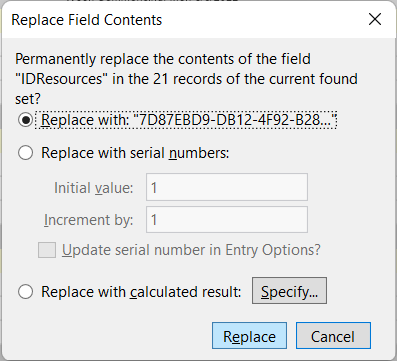
The room will then be changed for the full set of records.
Other changes that may need to be made
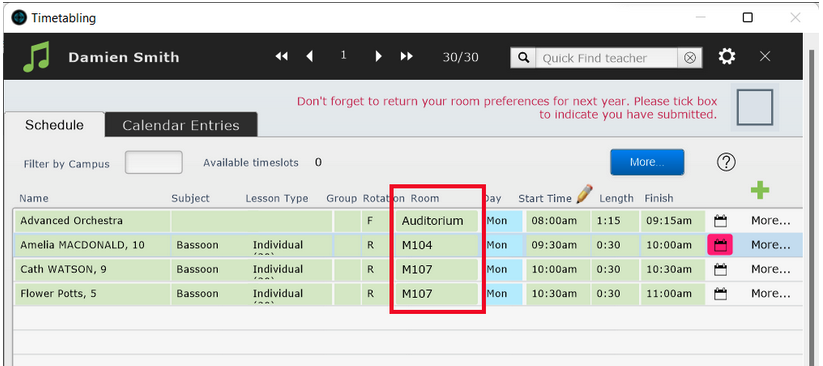
If the room is being changed for a teacher on a permanent basis, then, in addition to changing the room for the remaining calendar entries as above, the teacher's schedule will also need to be updated. This will ensure that the next term's timetable will be generated for the new room.
Go to Office Admin > Timetabling then search for the teacher. Then change the room listed on the relevant timeslots.
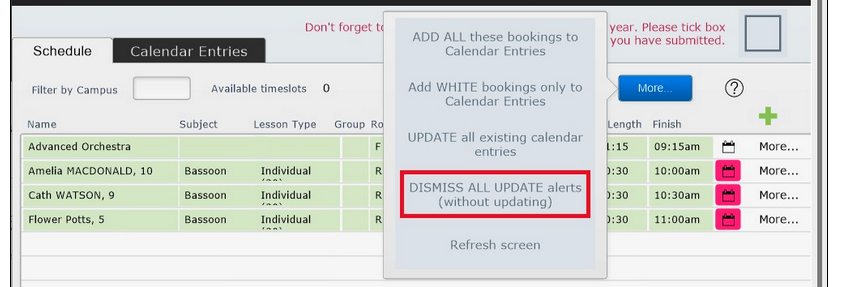
Once the room has been updated on all timeslots, a column of red calendar icons will indicate that the calendar entries can be updated.
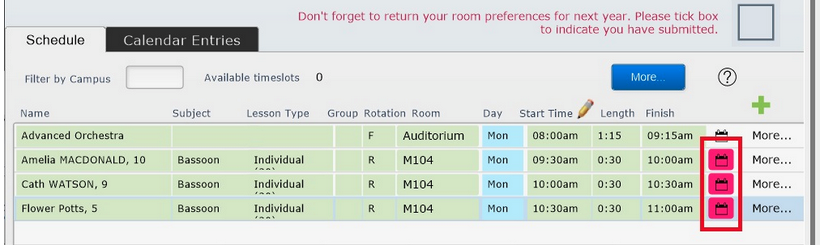
As the room has already been changed on the remaining calendar entries, it is best to dismiss these icons without further action. To do this, select More > Dismiss All Update Alerts (Without Updating).