
This article is no longer updated.
Please go to our new Intercom knowledge base to ensure you're seeing the most recent version.
The link above takes you directly to the equivalent article on Intercom.
There are several options that you can choose for your invoices. You can edit these settings during the invoicing process, or at any time.
While Generating Invoices
When it comes to finalising accounts lines, to generate invoices you need to select Produce Invoices in the options.
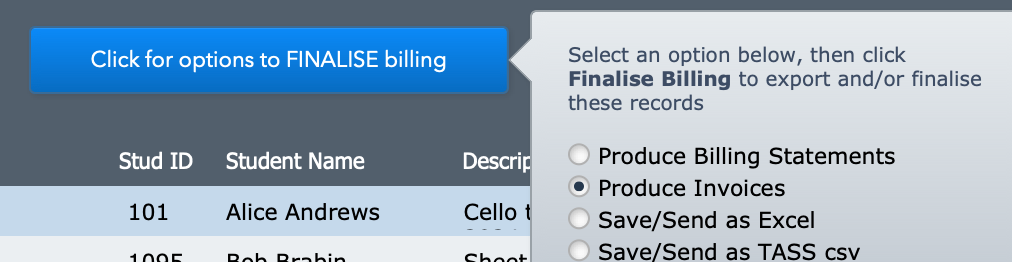
The next screen you come to will be the invoice setup screen.
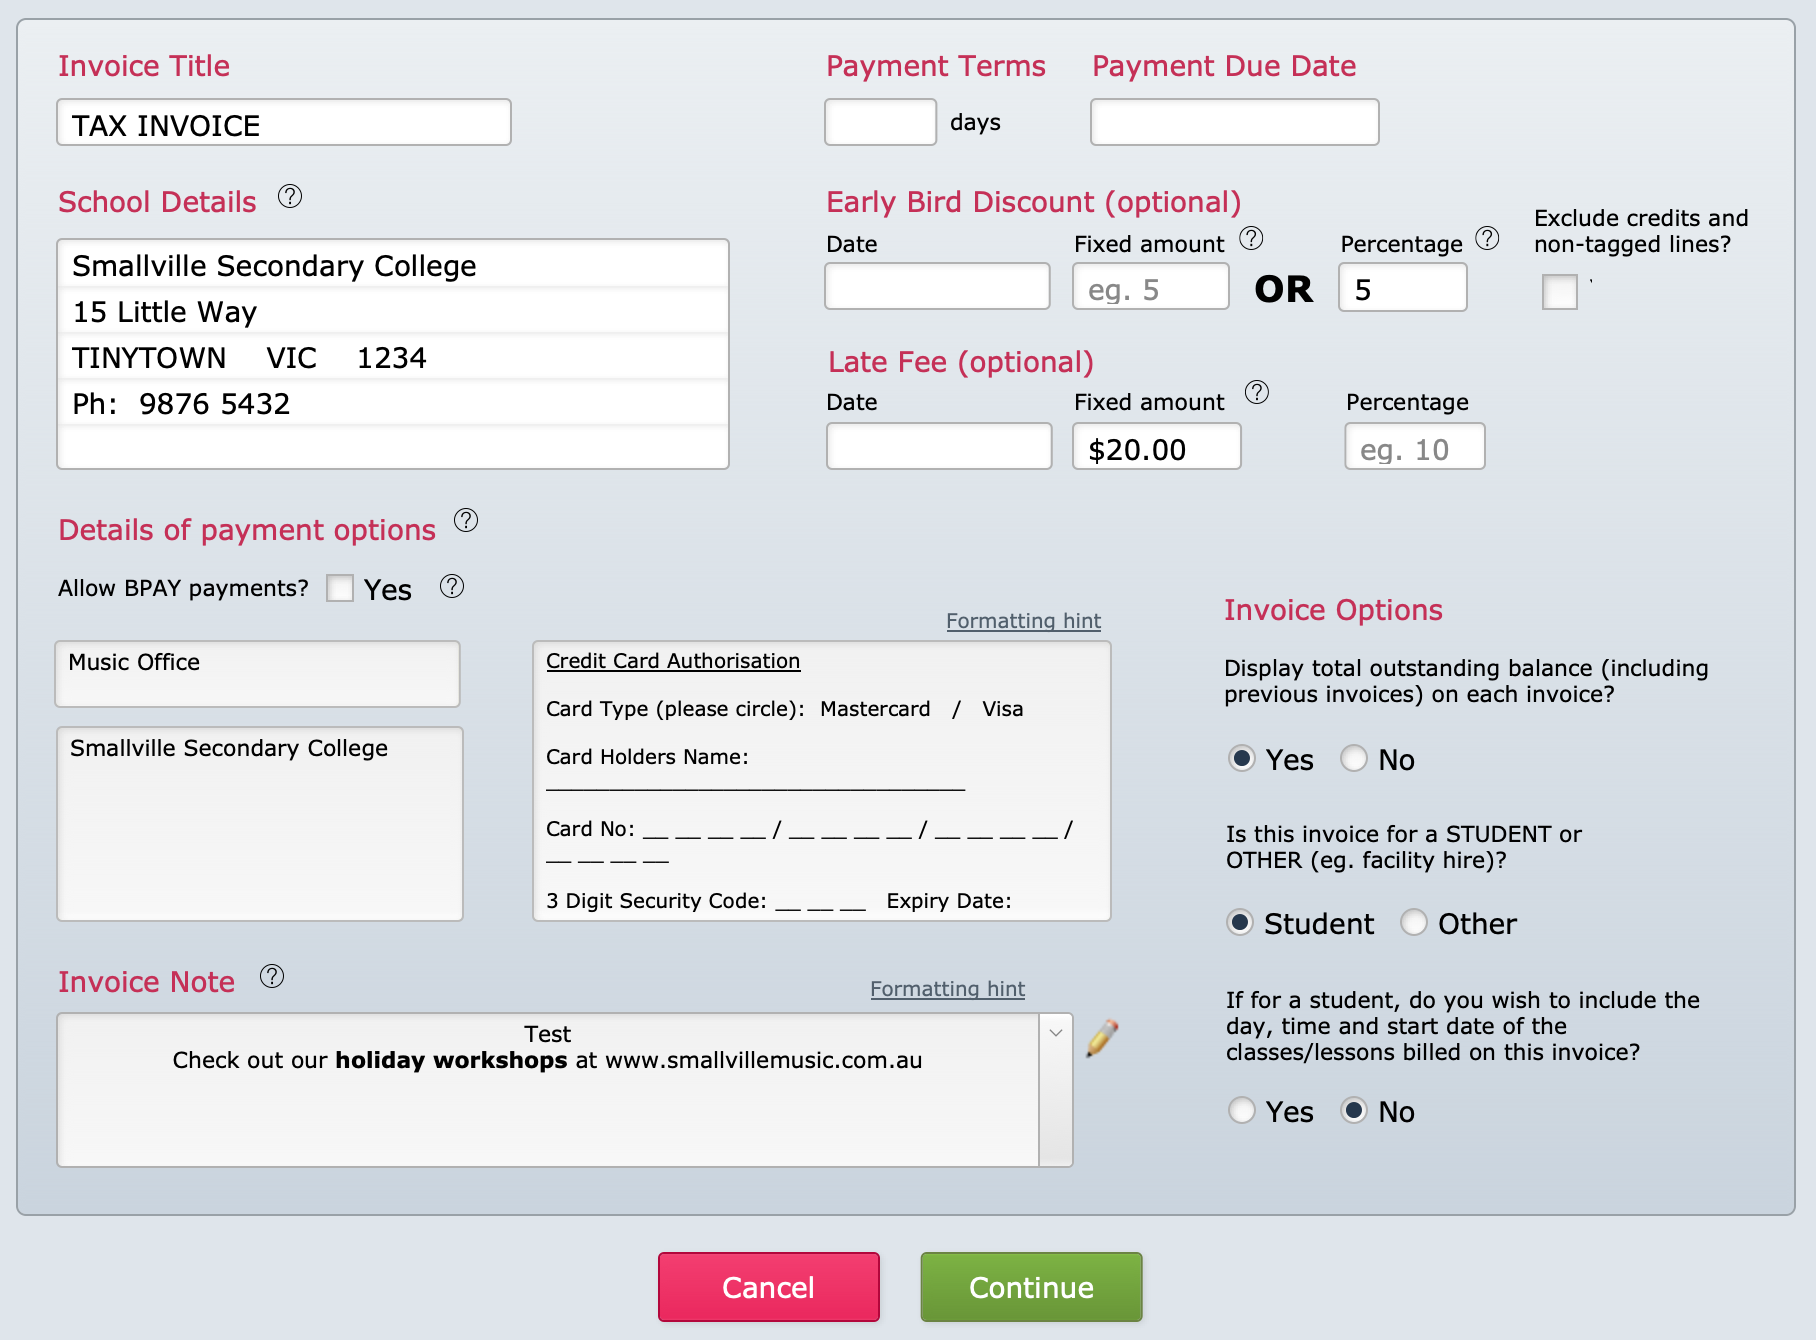
If you have previously set up your invoices as you need them, this screen should generally already be right for your needs. But quickly check, especially the Payment Terms and Payment Due Date fields.
Fields are filled out as below.
- Invoice Title - This is generally required to be "Tax Invoice"
- Payment Terms and Due Date - If you enter a number of days, it will calculate the due date for you. Alternatively, enter the due date directly and that will come up again by default the next time you produce invoices.
- Early Bird Discount and Late Fee - If you enter information in here, you will have the option on the invoices screen to apply these fees to the invoices.
- Details of payment options
- If you select to allow BPay payments, the invoice will display the BPay details you set up (see BPay Option on Invoices).
- The other text in the large box is just freely typed in. The sample text has a credit card authorisation slip, but you can replace it with different information as needed.
- Invoice Options - You can opt to display the total account balance on the invoice, in addition to the balance of the individual invoice.
- Invoice Note - You can add text that will be displayed along the bottom of the invoice. Once the invoice is generated, this text remains with the invoice record, even if you change it in the Invoice Setup screen later.
- See Change Invoice Note After Sending if you want to re-send an invoice but include a different invoice note from what was on it previously.
At Any Time
You can also change the invoice setup settings without running the invoice generation script.
Go to Common Tasks > Set Up – Conservatoriums > Set up invoice template
Changes made here will affect all reprinted invoices, except for the note text which must be reset manually.