
This article is no longer updated.
Please go to our new Intercom knowledge base to ensure you're seeing the most recent version.
The link above takes you directly to the equivalent article on Intercom.
View and Create Calendar Exclusions

The Calendar Exclusions button opens a view of the current calendar exclusions. Use the green plus button to add a new one.

On the next screen, enter a date, start and finish time, or 'All day'. Enter a brief description and select the students impacted. You can select ALL students, Year Levels, Form Home Groups, or individual students.
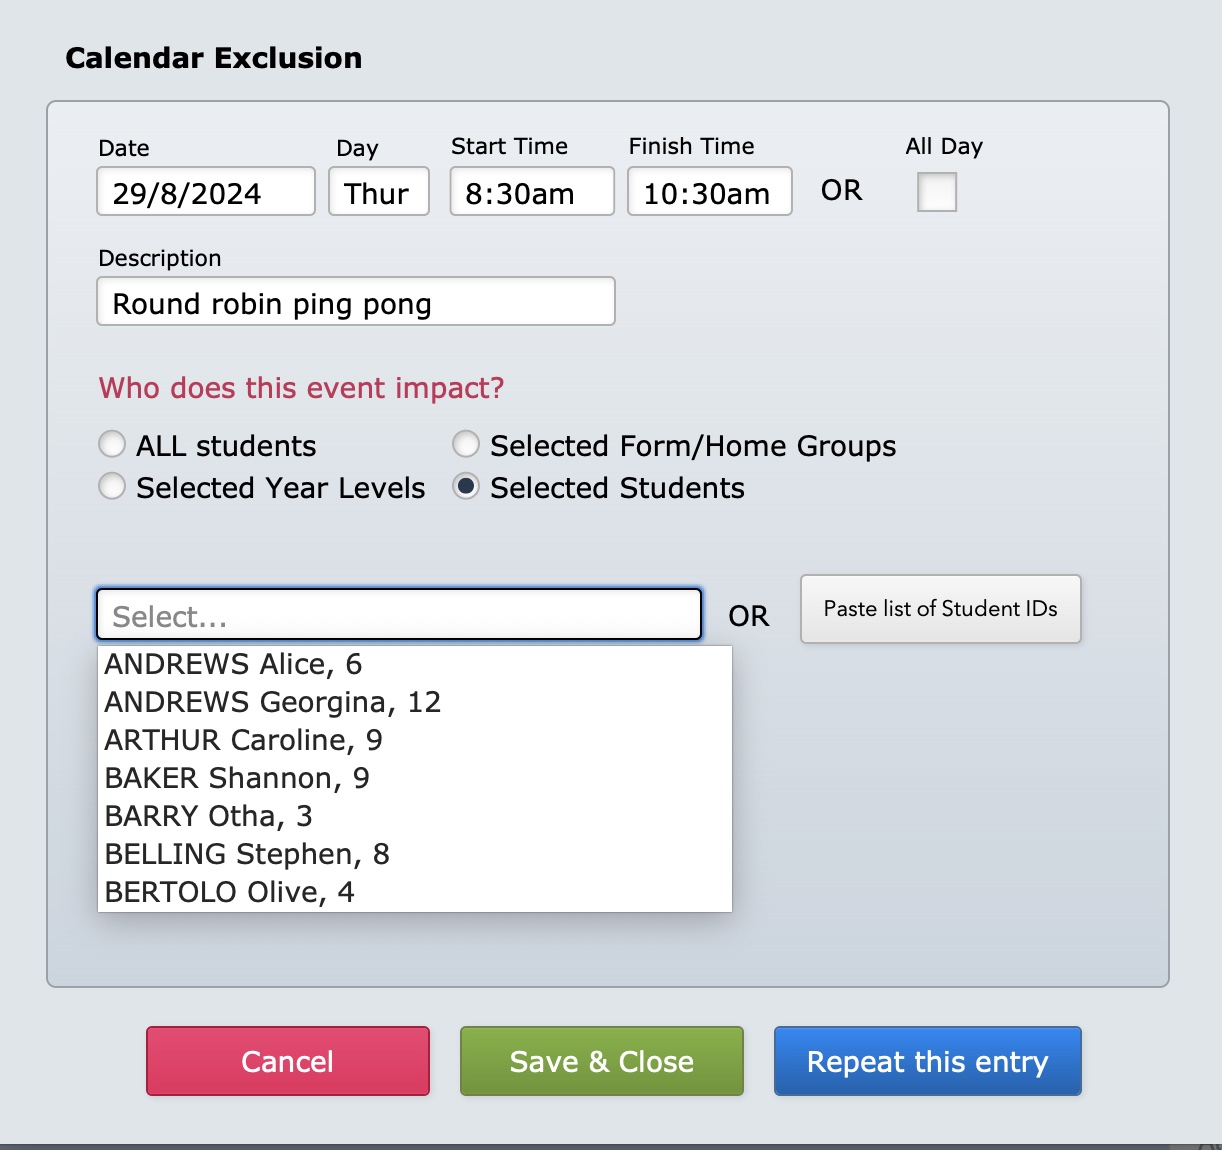
You can Repeat the entry weekly or fortnightly on selected days. (To repeat daily, select 'Weekly' and tick every day.)
After saving and closing the new calendar exclusion, additional information can be entered on the List view. You can upload and attach a file to the exclusion, and also add a URL link. Teachers can select the URL or the attachment to view more information about the exclusion.
Add Exclusions from the Students File
Calendar exclusions can be added for individual students from the Calendar tab in the Students file.
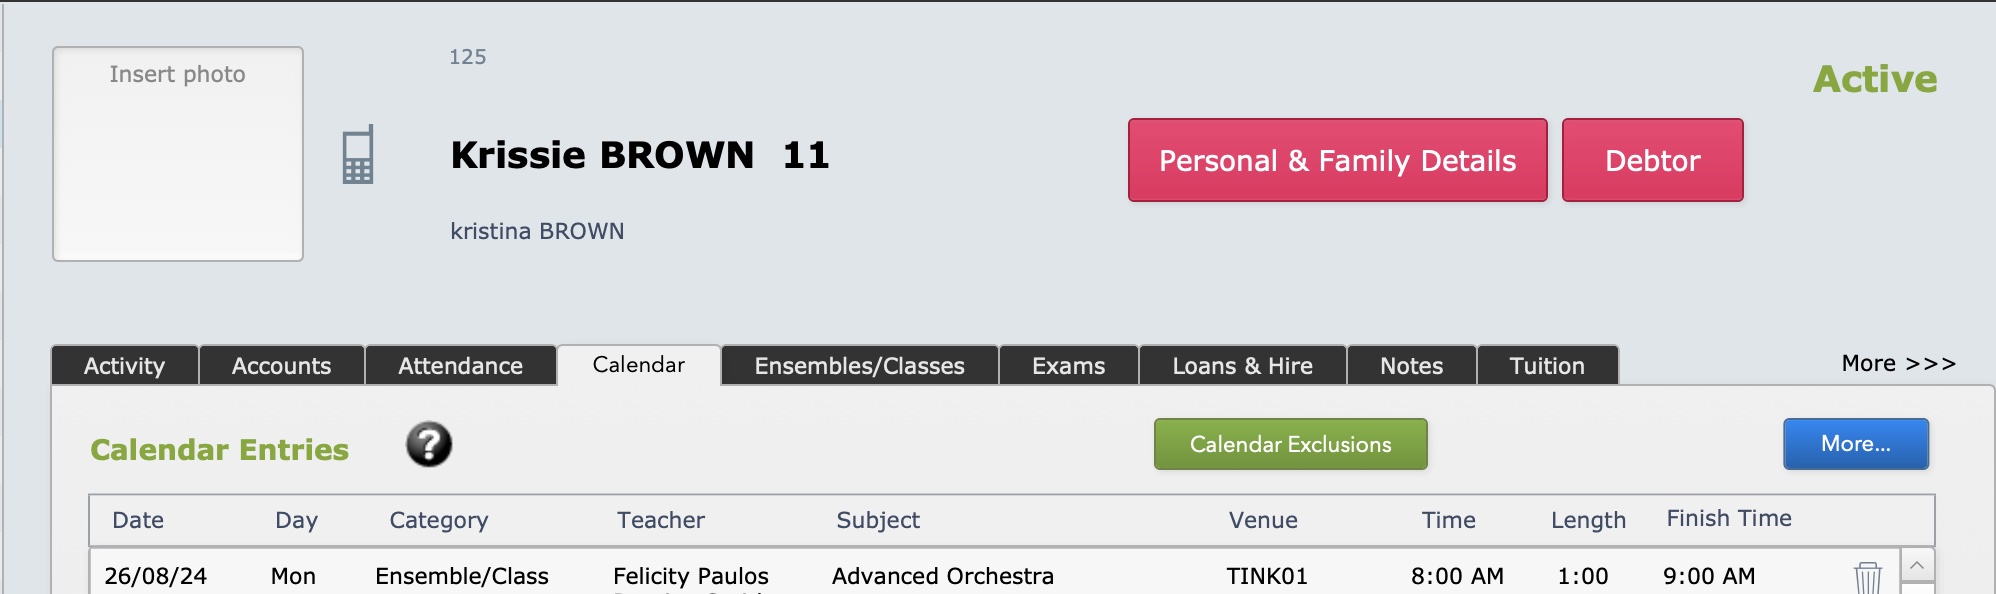
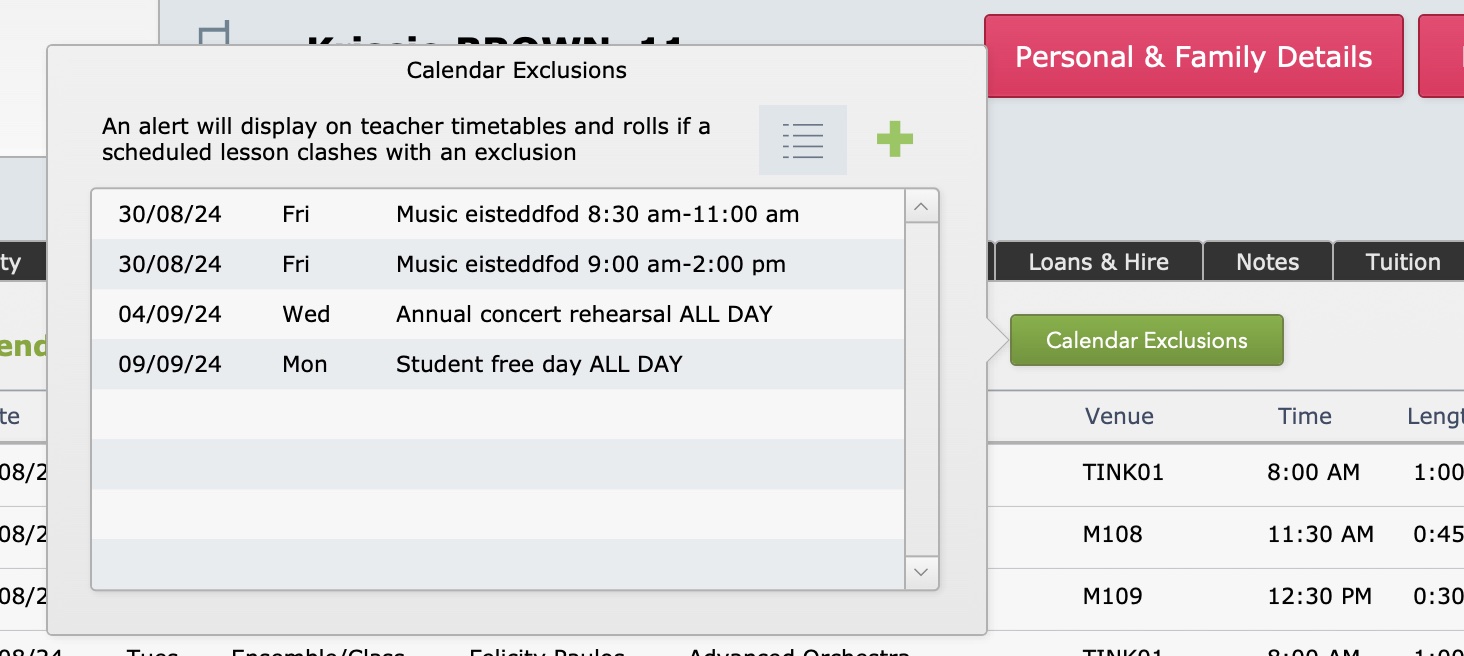
Select the green Calendar Exclusions button to view existing calendar exclusions for this student and select the green + button to add a new exclusion.
(For example, you may wish to enter an extended absence due to a family holiday.)
The new calendar exclusion window will open for you to enter details. The 'Selected Students' button and the student's name will pre-fill.
To edit or delete calendar exclusions for this student, select the List button to the left of the + button. This opens the Calendar Exclusions window and displays all the calendar exclusions for the selected student.
Add Calendar Exclusions for Selected Groups of Students
You can now add calendar exclusions for any group of students that you can find in the Students file. For example, you may wish to add an exclusion for all the senior ensemble students attending a day of rehearsals.
Perform a Find in the Students file for the group of students.
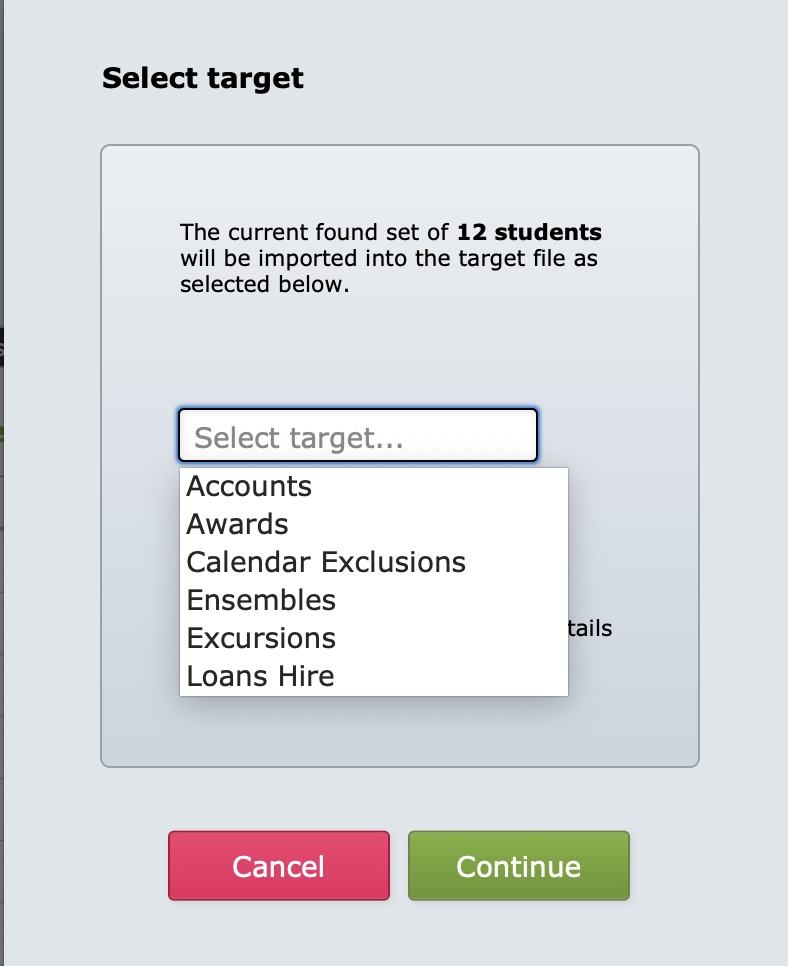
Select the blue More... button and Send FOUND SET to...
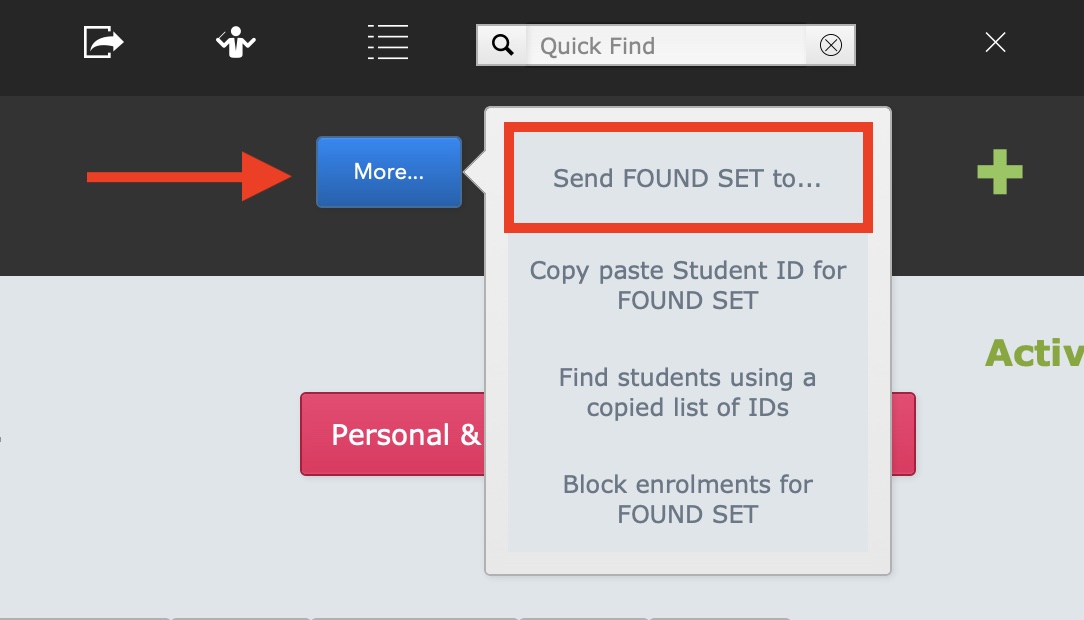
Select Calendar Exclusions as your target and enter the details on the next screen.
The calendar exclusion will be added for the selected group of students.
Respond to Calendar Exclusions
A calendar exclusion will be visible on the calendar as a yellow hazard symbol next to the calendar entry affected by the exclusion. This will be visible from the Calendar tabs in room management, students and contacts, as well as the timetables and rolls.

The yellow hazard symbol that shows if a calendar entry is clashing with a calendar exclusion can be dismissed. Teachers (or administrator) can select the entry to open and then select the Dismiss button.
If you need to add a new calendar exclusion (or edit an existing one) after teachers have already started work on their timetables, you may need to check whether any teachers have already ‘dismissed’ the exclusions for that date. On the calendar exclusions screen, select the More... button and Show dismissed calendar entries. This will find and display any entries that have ‘Yes’ in the ‘Dismiss’ field for that particular date. You can clear this field by removing ‘Yes’ in one of the records and then replacing field contents. This ensures the asterisk will once again display for the teachers to see on their timetables.
*New in 2025!* Tidy Up Calendar Exclusions
If you use this function extensively, you will collect a long list of records here, so it becomes one of the files that it's best to tidy up periodically to prevent slowing down your searches.
General Tidy-Up
A new script has been added in this category to Delete past calendar exclusions. It simply performs a search for calendar exclusions that are dated in the past. Then in the More... button, you have the option to delete the found set.
End of Term Procedures
There is also a new End of Term script to Update, delete, add new calendar exclusions. This simply opens the Calendar Exclusions file, but serves as a reminder to do what you need to in this file in preparation for a new term.