This article is no longer updated.
Please go to our new Intercom knowledge base to ensure you're seeing the most recent version.
The link above takes you directly to the equivalent article on Intercom.
We highly recommend that you spend time customising the Common Tasks area to match the way your school uses Music Monitor. It can make your processes much more efficient.
Common Tasks has its menu items organised into Categories.
Edit Existing Categories
Many of the categories contain a long list of scripts, all developed for different schools to meet different needs. Customising this list will make your processes clearer and your work easier.
As an example, most schools use some processes in Billing, but no-one uses all of them.
So you can customise it in several ways.
Tag Your Favourites
Simply select the tick box under Favourites to tag the scripts you use the most often. This will cause them to display with the yellow highlight you see here.
Make Notes About Your Processes
Next to the Favourites box is a field for Notes. Write things here that will remind you what your processes are.
In the example above, the note says "Don't do this until after billing adjustments have been completed." As you can see, the note is longer than the space allows. When you click on it, the full text will display.
Hide What You Don't Need
We recommend you hide scripts that are not applicable at all to the processes in use at your school.
To hide an item, select the Eye icon on the right-hand end of the row.
If your school doesn't charge fees for ensembles, hide the scripts relating to sending ensemble fees to accounts. If you only bill in advance, hide the ones that relate to billing in arrears.
You can un-hide everything in this Category by selecting the Eye icon at the top of the list.
Re-Order the Items
The order these items appear on the list is determined by the numbers on the left-hand end of each row.
You can just edit these numbers! Simply select a number and type something else in. The item will immediately slide to its new position based on the number you have entered.
NOTE: If you want to move an item to sit between item 3 and item 4, you can number it 3.1 (for example).
If your numbers get very messy-looking and you want to tidy them up, select the Settings wheel > Set Order to Whole Numbers.
This will keep the list in your current order, but will re-enter all the numbers as 1, 2, 3, etc.
Use a Checklist
As a process aid, you can use the Complete tick box to tick off tasks as you work through them. This is helpful for a process that has many steps, such as the rollover from one term to the next.
Once you have completed the whole process, select the Settings wheel > Clear 'Completed' in This List.
Create Your Own Category
You can create a new Category for this drop-down list. Some schools create a quick list of "Regular Admin Tasks", or perhaps you have a process with a lot of specific steps that you wish to have its own Category.
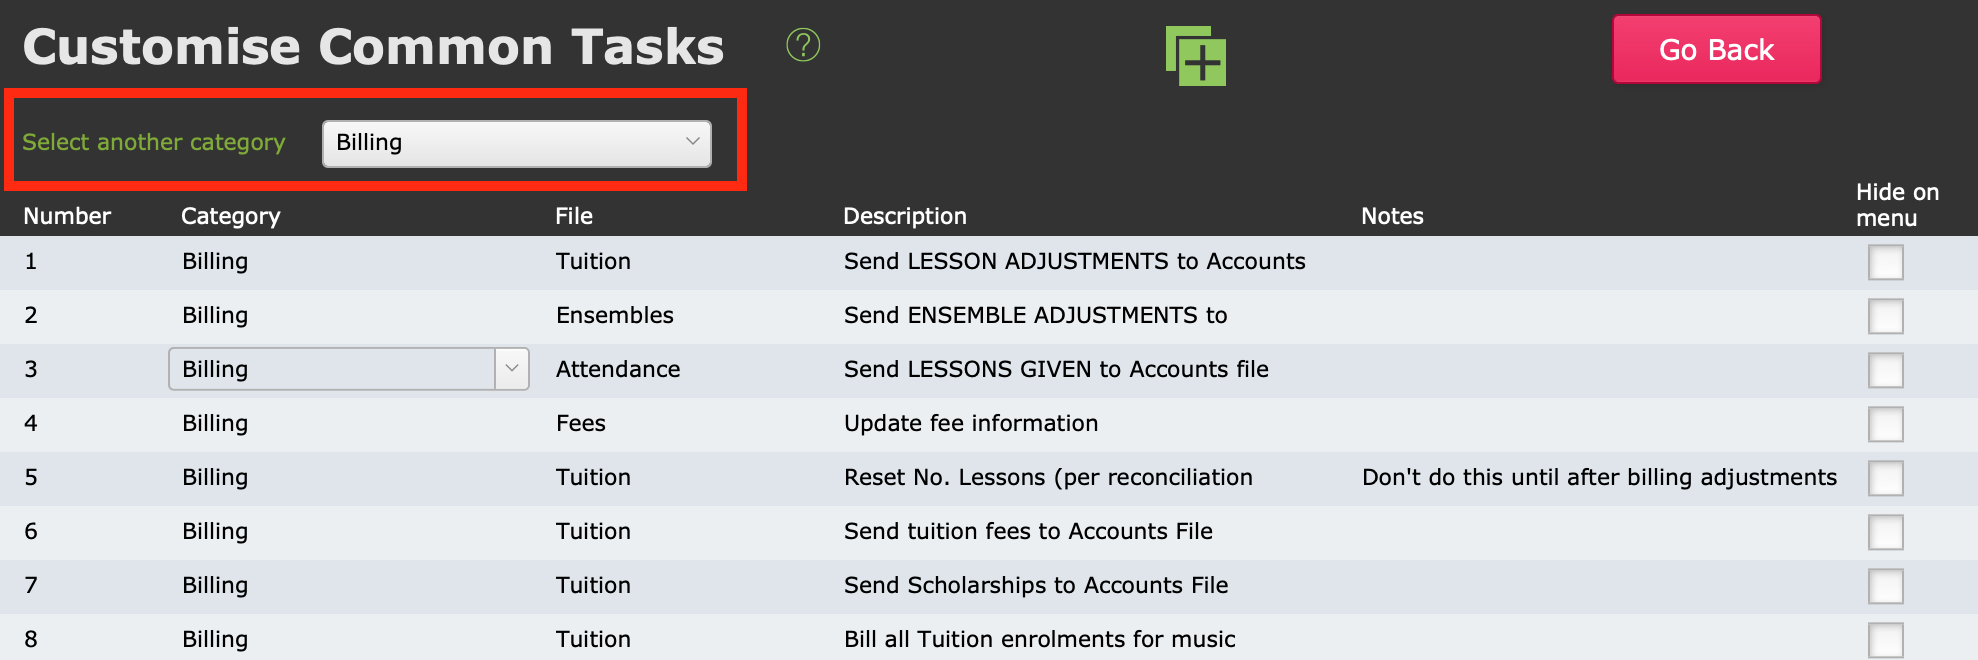
Go to the Settings wheel > Edit Categories
You come to the editing screen.
You cannot create new items from scratch. You can only duplicate an existing item.
- Use the Category selector to view the list that contains the item you want to duplicate.
- Select the item, then select the Duplicate button in the top of the screen.
- You will now see two of that item.
- In one of them, select the Category field and type the name of your new Category in there.
- Find other items to duplicate and add to your new Category.
Your new Category is now an option in the drop-down list.
Note: The numbers have been copied along with the rest of the item, so you may wish to number them differently in your new Category.


